
Dynaflite 81" Spitfire
Build Diary
Mike Amphlett.
Many of you will know that for the last many months I've been building a Spitfire.
Since I first started in this hobby, I've promised myself a decent Spitfire model. But, over the years I've either been too seduced by the low-cost ARTF sport models, or simply afraid of building the sort of Spitfire that I'd actually be proud of. To be honest, I didn't feel that some lightweight kit finished in shiny Oracover by some poor Asian kid who didn't understand what he was making did justice to the aircraft's place in history. So I flew my Wot 4s and Funtanas and so on.
And I became a passable flyer who regularly flew beyond his ability - in an increasingly expensive spiral of black-bag terminations and early, un-planned landings.
Latterly, as a semi-retired flyer, I've had to look more questioningly at the cost of the hobby - making a conscious choice towards larger and more sedate models, spurred on by the happy acquisition of my beloved renovated Precedent T240 a couple of years ago. A faulty receiver pack cost me that model, and although I replaced it with the big Hangar 9 Cub, I still felt that something was missing.
It was the personal pleasure gained from a proper build-and-fly project.
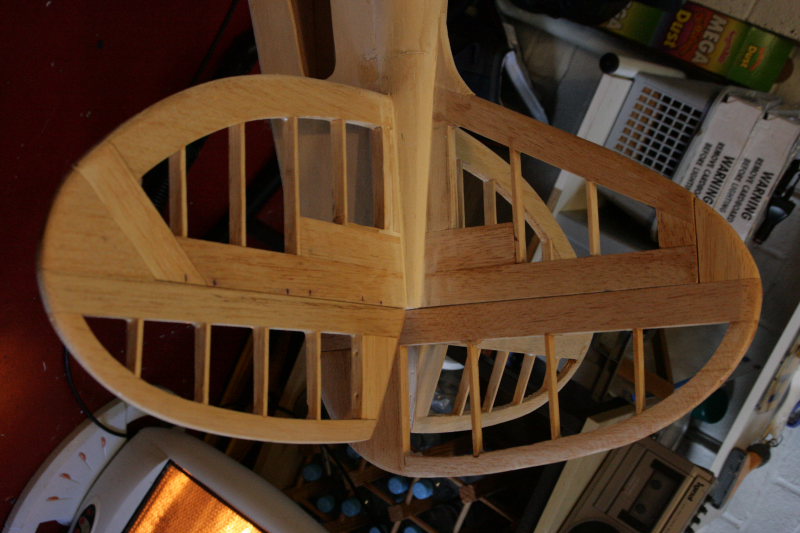
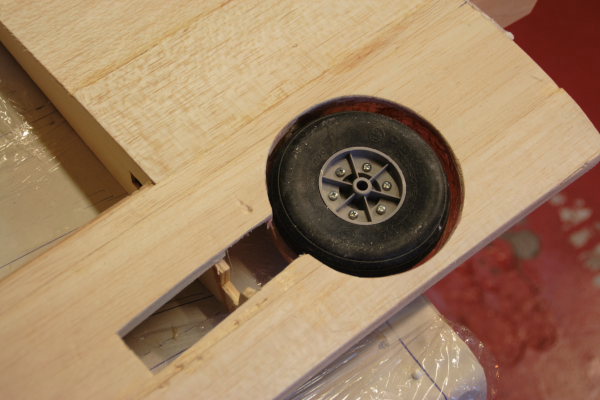
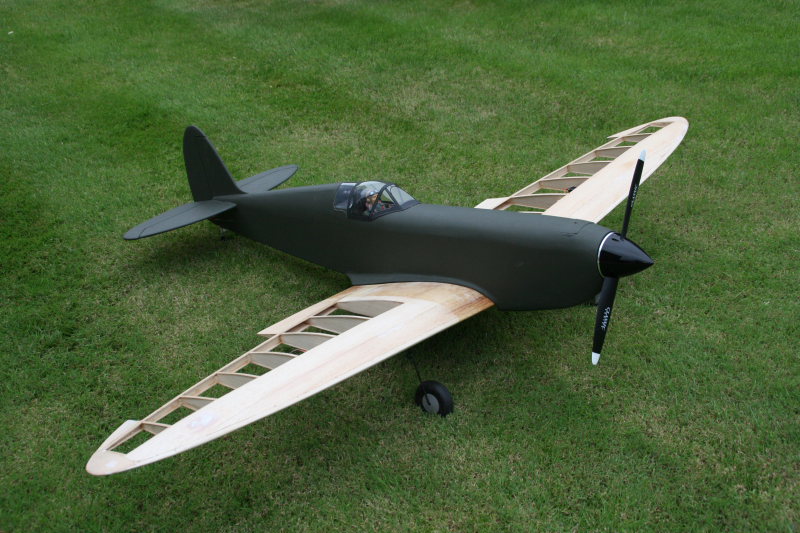
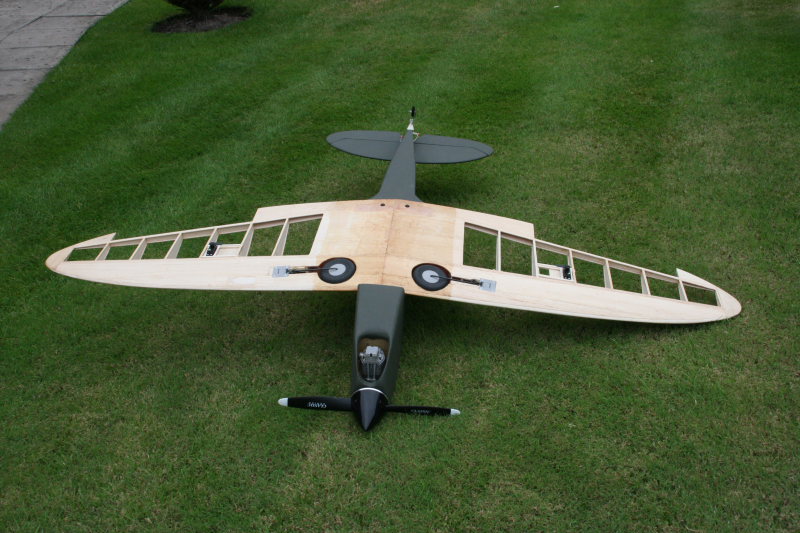
With the sad demise of our long-term friend Mike Bradley, came opportunities for many of us to benefit from his vast collection of completed, half-completed and never-flown models. A number have already been seen at the field, and many will remind us of Mike for years to come. Part of his collection was an old Dynaflite Spitfire kit, for which he had set aside an SC 120FS engine and a set of Robart air retracts. Having recently realised that the construction of an old, inherited (and huge) Fieseler Storch (without instructions) was beyond me, I jumped at the chance to build the Spitfire. It is a generic Spitfire - not a scale Mk9 or a clipped wing - just a long nose, an eliptical wing, THAT dihedral and a thicker chord that should fly OK. The air retracts also work outwards (unlike the original) so that the wheelspan can accomodate a grass strip without the need to balance on a wing-tip. This was probably engineered because there is sufficient chord to bury the wheels only near to the root.
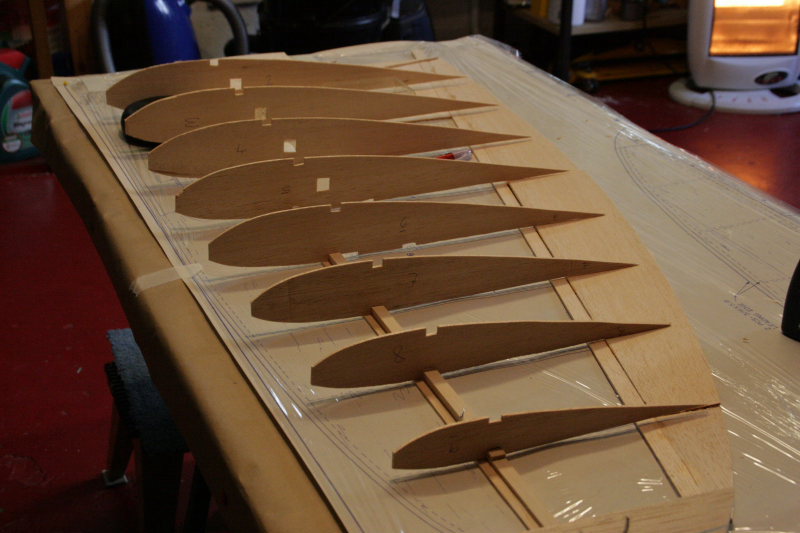
Right after taking delivery I started on the fus. Liteply sides, diecut formers etc. meant rapid early progress - despite the fact that the instructions were minimal. However the wings were a different matter, and having built the first half I chickened out about the joining method and didn't touch the beast for about 5 months. Oddly enough, having picked it up again, I could see the answers that weren't in the manual, so building has progressed quite fast.
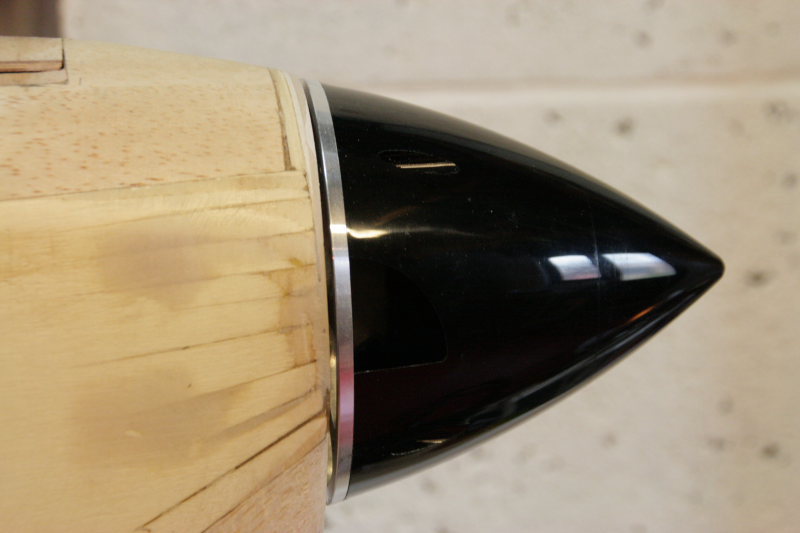
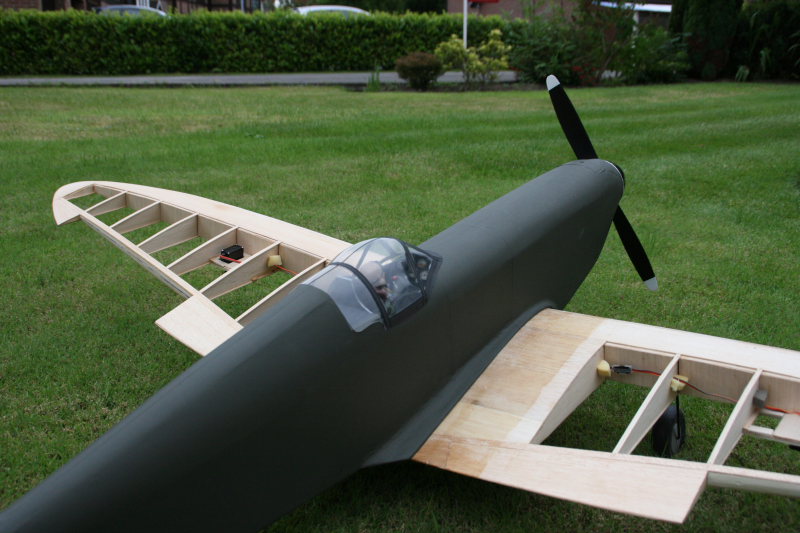
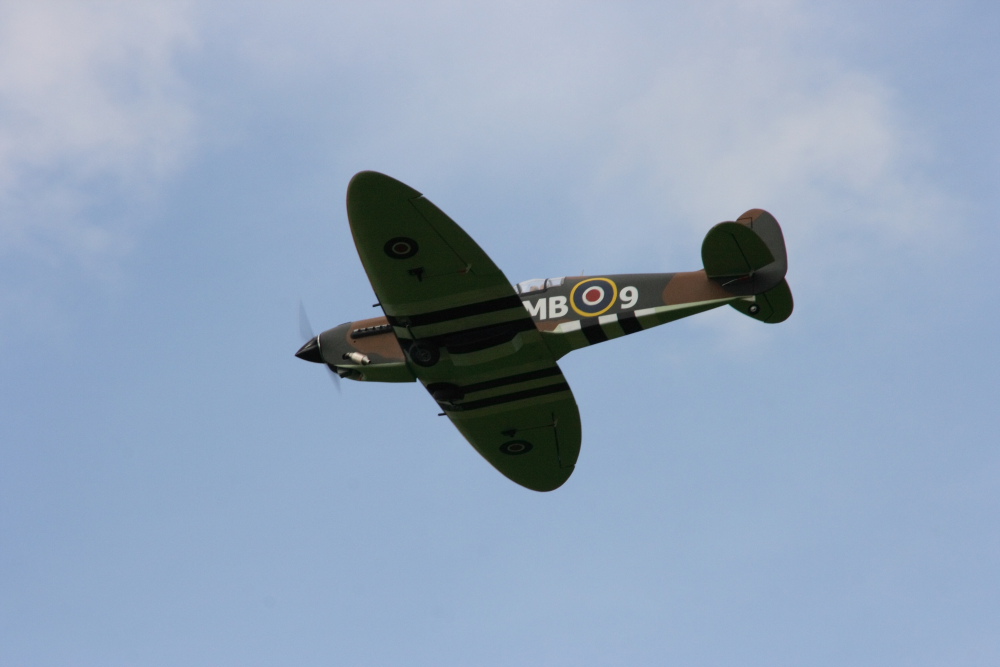
The following pictures show her as she is at 11 July 2009. She will be finished in a standard camouflage of 'olive drab' and 'red earth'. The underside will be duck-egg blue, and there will be some 'D' day marking visible on the underside. She'll get radio masts and wires (a la the early marques before VHF radios were installed). She'll also have Hispano cannons, but these may not be fully operational! The kit came with moulded exhausts, but I haven't decided whether to use them, or fabricate my own ..... but that's a detail for the future.
As regards the power plant, Mike had selected an SC120fs, which came with the kit as a bundle. Upon reflection, and having had such magnificent service from my ASP180 in the T240, I decided that the bigger motor would be better off in the Spit. The equation is simple - the 180 had more than enough grunt for the T240 and will be replaced by the SC120fs in my next one which starts after the Spitfire flies. I don't want marginal power in a 12lb Spit. I'll be putting in parallel batteries and switchgear, and she'll fly (or not) on 2.4Ghz.
A selection of pictures.....


So - how long to the dreaded (long-anticipated) day? I don't know. The rudder and elevator are connected and live. The throttle is connected but not yet tested. The retracts are aligned, but I can't fit the air tank and actuator servo until I've fitted the fuel tank. Plainly the wings require covering, although the ailerons are done. Then there's camouflage paining (how will I find it in the garage?) and matt finishing. Also I've to add details like guns and antenae etc. Total build time (I'm a slow bugger) will be over 450 hours.
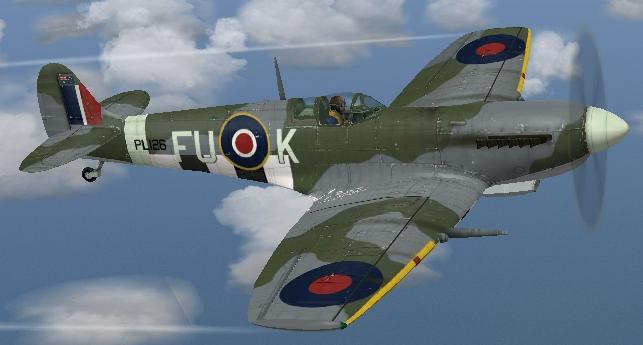
Finally, as this isn't a true scale model but better described as reminiscent of a Spitfire, or inspired by...etc etc, I can allow myself some flexibility over its markings. I chose battle colours for the majority of the airframe because that's what she was good at. But I wanted to see her in the air, so I chose to base mine on this, which uses an Australian squadron's letters....only they would have added the 'K' identifier! It leaves the top surfaces in battle colours, but allows the use of 'D' day markings beneath for visibility from below.
I propose to invent my own markings for her. She will carry the squadron letters MB, and the suffix on the other side of the roundel will be 09. That's a lot of emotional baggage tied up in one model. When she does get off, I hope I can enjoy the flight.
Mike Amphlett 11/07/2009
Well - I've had a bit of a spurt. Perhaps the fact of documenting the work done so far had something to do with it; more likely it's the continuing bad weather, but either way, she suddenly looks close to completion.
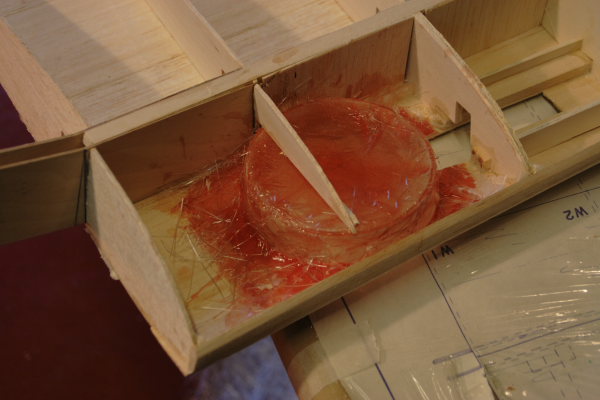
The wheel wells are tidy and painted. The air retract system is tested and the actuator installed onto the wing centre with its servo. The wing is covered, and both wing and fus have the promised 'red earth' camouflage.
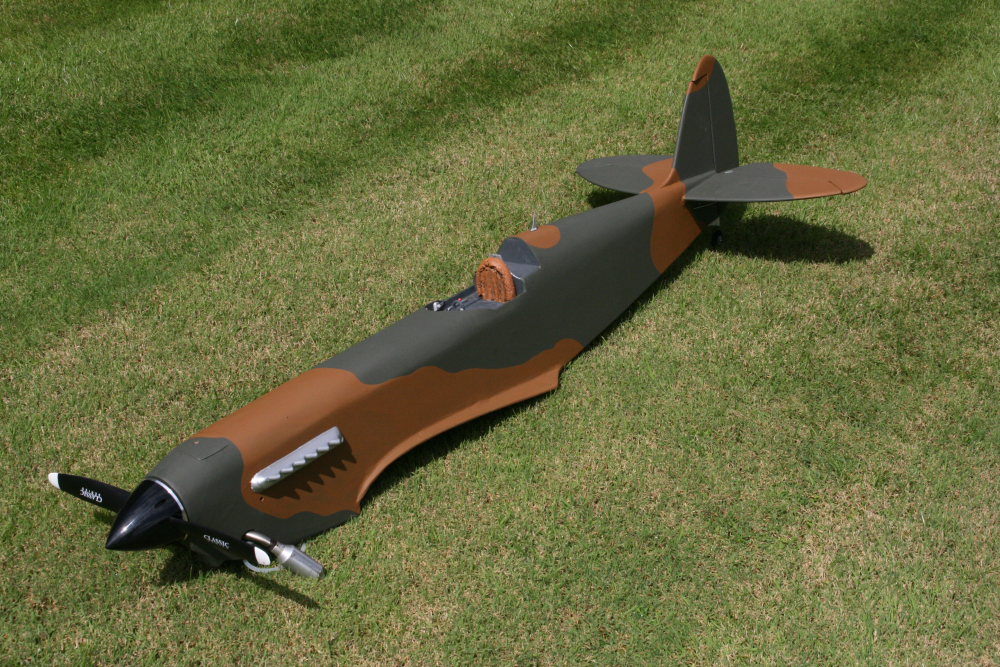

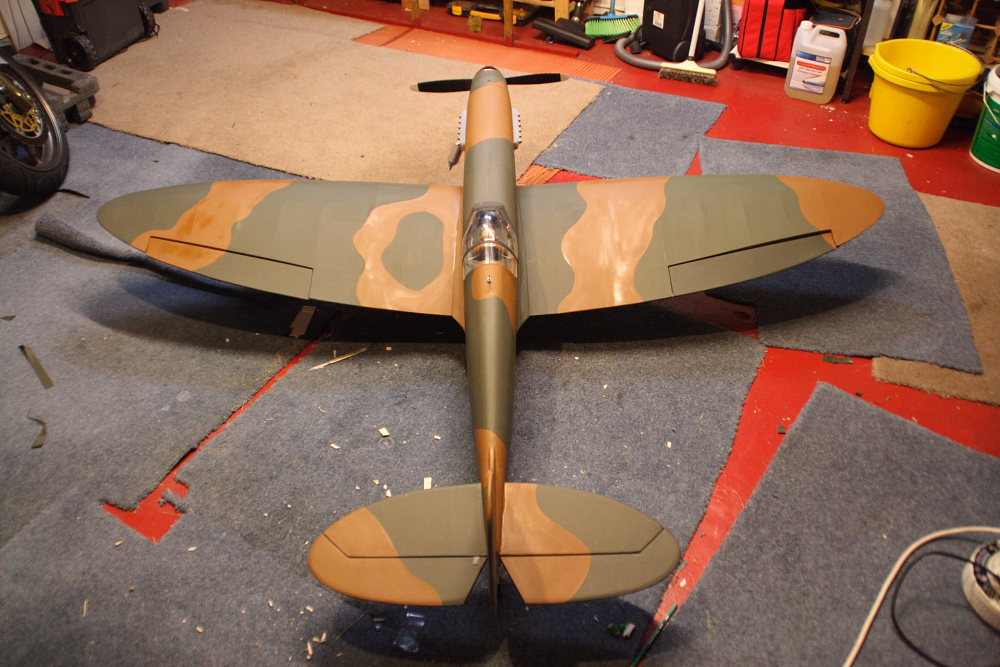
In the pictures above, I've included the outdoor one so that the true colour is visible. The two taken in the garage under flourescent light make it look a bit washed out, and I couldn't be bothered with photoshop - but they do show the camouflage pattern, which I think has come out OK. I decided to use the kit's plastic exhausts, which are pretty decent now they're painted. So what's left to do? Hinge and connect the ailerons (already cut for hinges - servos are in). Paint underside and add invasion stripes and markings. Spray matt finish all over. Fix pilot and canopy. Add air cylinder, quick release coupler between cyclinder and wing. Add compressed air top-up point in fus. Connect up throttle linkage to servo. Add wiring loom, RX, batteries and switches. Finish off by fitting Hispanos. Balance check. Static engine test. Range check. Pray for steady 8-10 mph easterly or westerly on a dry day.
Actually, if I say it like that, it seems to be no more than 3 or 4 hours work. However, knowing my rate of progress most of the time I still expect it to be another 2/3 weeks. Watch out Hun.......
Mike Amphlett 18 July 2009
This is the last post. No, obviously not THAT last post - not with bugles and sad stuff. This is the last post about the Spitfire build. It isn't quite complete - there are a small number of internal jobs to do. Fit the Rx, final install of air tubing, wiring and the on-board glow that Tom Doyle talked me into! Actually, I bought one off ebay, brand new for ?20 inc postage. I'll report on it when I've tried it.
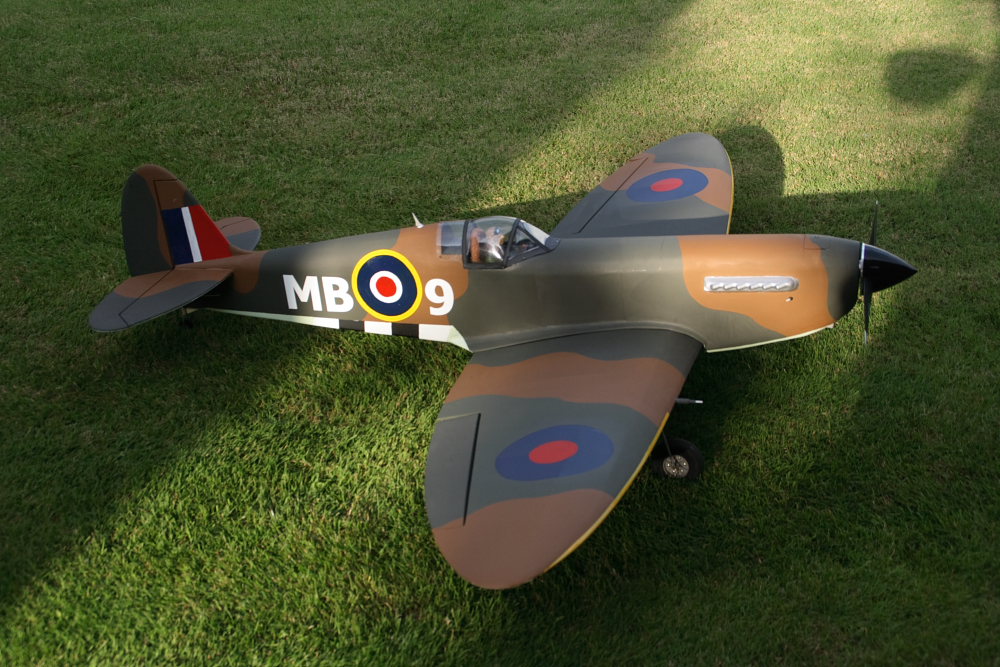
Anyway, the airframe is complete and decorated. The markings are as scale as I can get them (and the roundels are all in the correct proportions). I've included a couple of final photos, because nothing much will change between now and the awful (splendid) day of the maiden flight. Tom and I may try to synchronise two happy events - my Spitfire and his Pitts Special. That should be some excitement - photographers will be specially invited.
Here she is - dedicated to Mike Bradley - next time you see her I hope it's at the edge of the strip, ten minutes before a text-book two-pointer.
Mike Amphlett - 23 July 2009

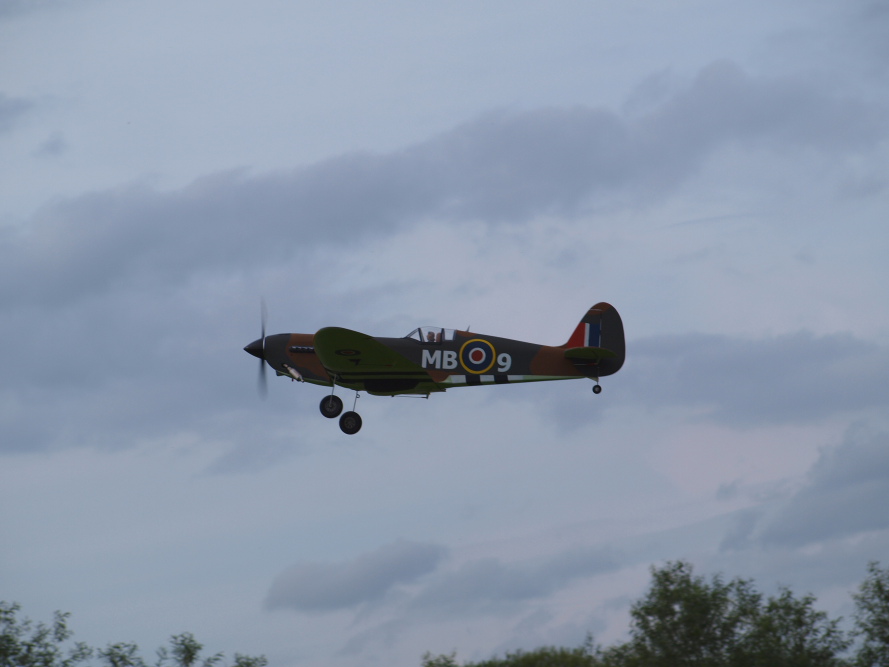
Guess what! I have another short chapter to add to MB9's life story. At about 1350 hours on Sunday August 2nd 2009 she slipped the shackles and committed aviation. It wasn't a perfect take-off, but she rose with great authority and, after a couple of minutes fettling the trims she flew straight and level long enough for me to get my distance glasses out of my pocket and onto my nose! The landing was a messy affair. The approach was long and uneventful, but because of the large and unfamiliar size of the model she was further away than I thought. Then I found out just how much braking you get from an 18" prop at a very slow tickover - too much. This resulted in the neccessary addition of a few revs for a second, an attempted turn (as I was over the long grass behing the strip) and a fledgling tip-stall that went away as she side-slipped into the grass and onto her spinner. The only damage was to the rather soft sprung legs - so I've decided to keep them as protection while I master landing the beast.
Later in the afternoon I was blessed with a couple of magnificent take-offs where she just took up the right attitude and simply left the ground as if on strings. Loops are magnificent, but I have to work on my barrel-roll. Landings are improving as I get the confidence to approach a little quicker, safe in the knowledge that she will slow down quickly once over the strip.
As the evening approached the wind dropped, and I got the feel of just how realistic the model's characteristics are. The Spit has a tendency to slide/sink in a very pretty way from a 30 degree bank if you want a descending turn, especially on approach. This model mimicks it perfectly. She isn't true scale, but the authority in the air, the graceful turns and the slim eliptical wing leave you in no doubt as to her inspiration.
It's been just about a year since I started the build. I had thought it was longer, but I checked the dates on some pictures. There are still things to do - the usual bits that crop up when you first fly a complex model, but nothing too demanding. She'll be out and about quite often (fingers crossed) when the wind is in the right direction and I've got some Vallium in my pocket. All in all I'm very satisfied. I'm delighted that she flys so well; can't stop grinning when I see the front profile with the wheels up; love the sound of the 180 (the 120 absolutely would have been a mistake); and to be honest I'm a bit proud of myself for doing the job reasonably well and ending up with something I'd wanted for a very long time.

That's it. The story is finished - unless I write another page when she makes her first kill. If you're interested, I hope to see you at the field soon.
I need to thank Ian Jones and my son David for pictures (a selection are above) and video (I'll put something on YouTube shortly). Also particular thanks to Tom Doyle for advice and encouragement
Mike Amphlett
August 2nd 2009
Just when you think you're finished, there's always another chapter. This is a detailed one, but it is a cautionary tale. Flushed with Sunday's success I took the Spit to the field a couple of days later. She wouldn't run properly, then wouldn't start. I blamed on-board glow, fuel tubing etc. etc. Then I realised that the compression had vanished - in its place was a 'mushy' feel, and the electric starter couldn't spin it fast enough to fire. Several people looked at it and turned over the engine. Diagnoses varied from main bearings, to valve gear, to crankcase flooding so I decided to take it home and strip the engine.
On the bench, I found that the prop was a little loose, not wobbly, but not providing full drive. I should have tightened it there and then, and checked compression but my head was so full of all the stuff that might be wrong I chose to continue the stripdown. The engine was in remarkable condition, so I cleaned what I could clean, refitted the valve gear to timings found on the internet (a link through Just Engines site) and confidently re-assembled everything. The engine is a tight fit, and the 'remove and replace' took 3 hours - plus the stripdown. Back to the field, apply the starter. Engine spins over OK but won't fire. Try several times then it fires, runs for 3 seconds and dies. No further life except for the odd backfire, which the engine had always had a tendency to do. Thinking I'd messed up the valve timing I took it home to strip it again.
On the bench I found that I had indeed got the timing 180 degrees out. I don't know how, but I had. So, I reset it after re-grinding the valve seats, double-checked the timimg and re-assembled it. With great confidence I arrived at the field today (Tuesday 11th) intent on enjoying the perfect weather. It wouldn't start. Checked valve clearances and slackened them a bit, but still nothing. Backfires were present, but it would not run. So, despite promising myself I'd never do such a thing, the decision was made to strip it on the field where advice was readily available. Gordon Canavan is as well-versed in 4-strokes as anyone, so I enrolled him as advisor on the project. With everything on an old bed sheet to avoid losses, I found that due to practising so often, the engine was out and in my hand in 14 minutes. We did a visual check and everything seemed to be happening in the right sequence and at roughly the right time. I now began to question two things. 1- my own sanity. 2 - the integrity of the valve timing information I was using.
I phoned just engines and spoke to Jenny, who advised me of the setting straight from memory. There were subtle differences between the two descriptions, but she was adamant that her way was correct. The timing dot on the cam gear should be in line with the pushrods when the piston is a TDC - not in-line with the right-hand side of the cam follower as in the document I'd read. The difference my friend is exactly one tooth on the gear, or about 6 degrees; the difference between running and not running. The explanation is that because the gear is helical, it counter-rotates as you slide it into mesh with the timing gear on the crankshaft. Jenny was describing where it should be after insertion - the other description was where it should be aligned at the starting point to allow for the counter-rotation during insertion BUT THE AUTHOR HADN'T MADE THAT BIT CLEAR.
Anyway, with help from the pit crew (where space allowed) everything was fitted back inside the airframe. In less than 90 minutes including a frustrating internet search for JE's phone number (I refuse to pay for directory enquiries) the engine fired up. Within a further 30 minutes, after a little fettling, she was in the air. There is still some fine tuning to do as I had 2 dead-sticks, the second of which caused some war wounds as she refused to come down, overshot the runway in the air and floated on to meet the only bush on our side of the stream. She has 2 or 3 'small arms' damages to the fabric on top of the wing, and a raking, 'machine-gunned' slit about 3 inches long on the underside. Apart from those badges of honour she is absolutely fine. For a Spitfire the glide is amazingly long, and while I tried to fly her over ground as low and slow as I could to protect the retracts, there was no tip stall.
I've learned a lot with this project and I'm still learning, but to fly the model is very rewarding so I have no regrets.
Mike Amphlett
11th August 2009
Here's a little more that I've learned. You may have noticed that the Spit's engine has been less than well-behaved. Even after the initial gremlins were ironed out, the unit has proved inconsistent and often loses power from the top end. This is a liability in a Spit when trying to do a barrel roll. You have to start nose up anyway, but if the power is down a bit the manoeuvre ends with the nose down a lot.
Recently I've noticed that the main needle is not having as direct an effect as it should. Test running at home, I found I could screw it right out to pure fuel without stopping the engine. Time to get it out again for another look. There is now quite a lot of fuel around the engine bay, and I'm concerned about the long-term integrity of the construction. First of all though I need to find out what's causing it, and why the otor won't run right.
Careful stripping of the ASP 180 FS (used to run like a dream in the old Precedent T240) brings up only two things. The tappets are a bit sloppy, and the joint between carb body and inlet manifold, which is tube-in-tube sealed by an 'o' ring to allow for flexibility of alignment feels very loose. I reset the tappets and ordered a full set of gaskets and 'o' rings from Just Engines for a few pounds and waited. They arrived today (Friday) so I installed them all. The difference between the inlet manifold 'o' ring that came off, against the new one was incredible. The new one was fatter, but it had stretch and spring, while the old one was like a piece of liquorice. Not to taste obviously, but it had almost no stretch and a very slow recovery. With the new one installed, the sloppy joint now felt positive and I could feel the interference fit. Thinking back, I reckon it was in the early days when the engine overheated that these rings lost their bounce.
Anyway, she's all back together again with a new, slightly smaller tank to allow a more central positioning with respect to the main needle, and re-routed fuel feeds. Saturday will tell the story!!
Mike Amphlett
12 September 2009
Click here to view a photo gallery of Mike's Spitfire
And just to round things off, here's the video:
SCRCS Home
© SCRCS 2010
Photographs Ian Jones unless credited otherwise.